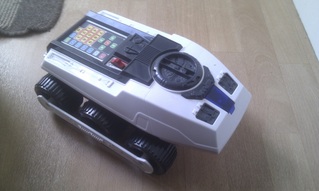
Ok, so now I have the motor driver working, it is time to install it into the Bigtrak. The first job was to remove the circuit board, key pad and disconnect the wiring. With that done, I connected the motor driver to the Bigtrak's motors, 4.5v power supply and Arduino Uno.
The next job was to connect the Arduino to a separate 9v power supply, then screw the boards in place. Luckily, there are a few screw holes no longer used by the original board.
Once everything was in place I installed a variation of the blink sketch to test for functionality (code included at the bottom of this entry).
To see the Bigtrak in action check out these YouTube videos:
| | |
All comments, suggestions and feedback are welcomed.
Test Code
void loop() {
digitalWrite(11, HIGH); // Back
digitalWrite(5, HIGH); // Back
delay(1000); //
digitalWrite(11, LOW); //
digitalWrite(5, LOW); //
delay(1000); // wait for a second
digitalWrite(10, HIGH); // forward
digitalWrite(6, HIGH); // forward
delay(1000); //
digitalWrite(10, LOW); //
digitalWrite(6, LOW); //
delay(1000); // wait for a second
digitalWrite(6, HIGH); // turn left
digitalWrite(11, HIGH); // turn left
delay(1000); //
digitalWrite(6, LOW); //
digitalWrite(11, LOW); //
delay(1000); // wait for a second
digitalWrite(5, HIGH); // turn right
digitalWrite(10, HIGH); // turn right
delay(1000); //
digitalWrite(5, LOW); //
digitalWrite(10, LOW); //
delay(1000); // wait for a second
}
 RSS Feed
